
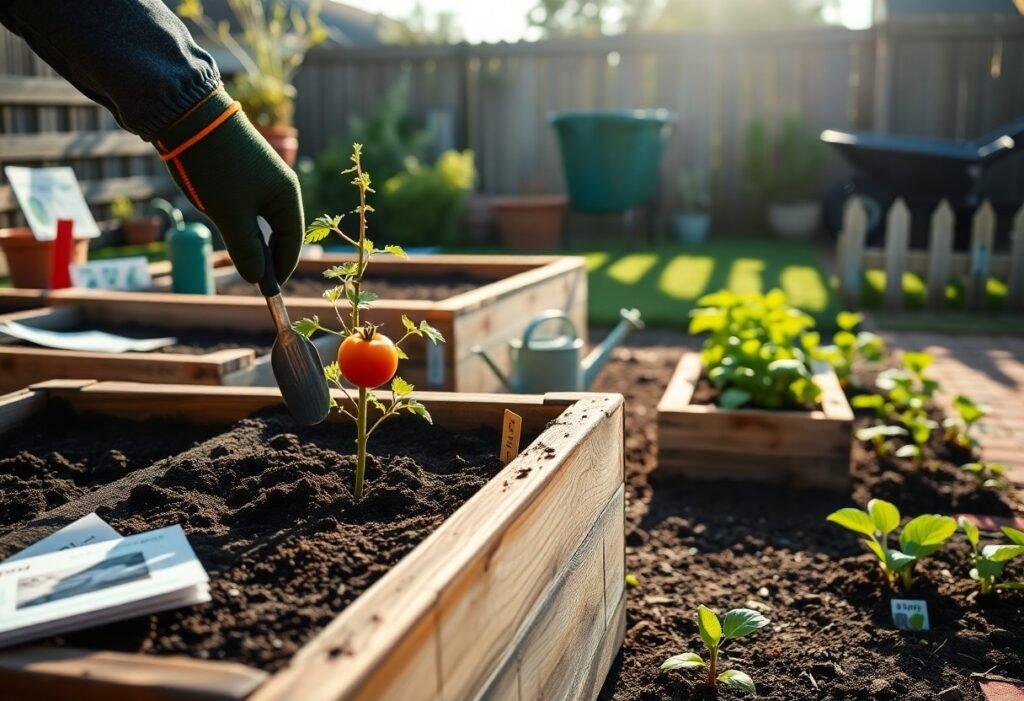
Many first-time gardeners underestimate how much satisfaction comes from growing their own food, yet you can start reaping harvests within weeks using simple, proven methods. This guide walks you through each step of building a productive backyard garden from the ground up, tailored to your space, climate, and goals.
Evaluating the Environment: Critical Growth Factors
Success in your backyard garden begins with understanding the natural conditions already present. Sunlight, soil quality, drainage, and local weather patterns directly influence which plants will thrive. A patch that receives at least six hours of direct sun daily supports most vegetables, while shaded areas suit leafy greens or herbs. Nearby structures and trees create microclimates that can either protect or hinder growth. Wind exposure and frost pockets also play a role in plant performance.
- Observe sun patterns across your yard throughout the day
- Note areas that collect water after rain or remain dry
- Identify sheltered spots near fences or buildings
- Watch for signs of compaction or erosion in the soil
Any oversight in environmental assessment can lead to stunted growth or crop failure, making this step foundational.
Assessing Sunlight and Microclimates
Sunlight dictates the energy available for photosynthesis, so tracking its movement helps determine ideal planting zones. Most fruiting plants require full sun, while ferns or hostas tolerate shade. Spend a day noting which areas are bathed in light and which stay cool under tree canopies or building overhangs. South-facing zones in the Northern Hemisphere typically receive the strongest exposure. Adjacent walls or pavement may reflect heat, creating warmer microclimates suitable for heat-loving species like tomatoes or peppers.
Observe how morning fog or afternoon shade shifts across the yard, altering temperature and humidity levels in small zones.
Analyzing Soil Composition and Drainage
Soil structure affects root development, nutrient availability, and water retention. Loamy soil, a balanced mix of sand, silt, and clay, supports most garden plants. To test texture, squeeze a damp handful: sandy soil crumbles, clay forms a tight ball, and loam holds shape briefly before breaking apart. Poor drainage leads to root rot, so check how quickly water soaks in after rain. Raised beds or organic amendments can correct deficiencies.
A simple percolation test involves digging a hole, filling it with water, and timing how long it takes to drain.
Clay-heavy soils retain moisture but restrict root penetration, while sandy soils drain too quickly and leach nutrients. A mid-sized SaaS firm might rely on cloud redundancy, but your garden depends on balanced soil. Incorporating compost improves both structure and fertility, encouraging beneficial microbes and earthworm activity. Drainage issues often appear in low-lying areas where puddles persist beyond a few hours. Correcting slope or installing French drains may be necessary in extreme cases.
Selecting Your Approach: Common Garden Types
Home gardeners typically choose from several established systems, each suited to different spaces, budgets, and physical abilities. The most common types include in-ground plots, raised beds, container gardens, vertical structures, and straw bale or lasagna beds. A mid-sized SaaS firm employee with limited weekend availability might prefer low-maintenance containers, while a family with a large yard may opt for expansive in-ground cultivation. Assume that
| Garden Type | Best For |
|---|---|
| In-Ground | Large yards, budget-conscious beginners |
| Raised Beds | Poor soil areas, better drainage needs |
| Containers | Patios, small spaces, mobility |
| Vertical Gardens | Urban settings, wall spaces, trellising crops |
| Straw Bale | Temporary setups, no-dig preference |
Traditional In-Ground vs. Raised Bed Systems
Soil directly in the yard defines in-ground gardening, requiring minimal startup cost and basic tools like a shovel and rake. Drainage and native soil quality vary significantly by location, often demanding amendments like compost or sand. Raised beds use framed soil mounds, typically 6 to 12 inches high, filled with custom soil blends. These warm earlier in spring and reduce back strain during maintenance. A homeowner in a region with heavy clay may find raised beds prevent waterlogging.
Vertical Gardening and Container Solutions
Containers offer flexibility, letting you grow herbs, peppers, or lettuce on decks or fire escapes using pots, buckets, or window boxes. Vertical systems stack planters or use wall-mounted pockets to grow strawberries, greens, or cascading nasturtiums. Both methods suit renters or those with minimal outdoor space. Assume that
Tomatoes and pole beans thrive when trained upward on trellises, saving floor space and improving air circulation. Fabric grow bags promote root aeration and are easily stored off-season. A balcony gardener in Chicago successfully grows cherry tomatoes and basil in five-gallon buckets with drainage holes, moving them slightly each week to follow sunlight.
Setting Expectations: The Pros and Cons of Gardening
Gardening offers tangible rewards but demands honest assessment of both benefits and challenges. A home garden can supplement your food supply, yet requires consistent attention and resources. Understanding these factors early helps prevent frustration and supports long-term success.
| Pros | Cons |
|---|---|
| Fresher produce with better flavor | Initial soil and tool costs add up |
| Reduced grocery spending over time | Weekly maintenance is non-negotiable |
| Increased physical activity outdoors | Pests like aphids or rabbits may invade |
| Greater control over pesticides and fertilizers | Drought or heavy rain can damage crops |
| Opportunity to grow rare or heirloom varieties | Learning curve with plant-specific needs |
| Therapeutic, stress-reducing activity | Space limitations in small yards |
| Composting reduces household waste | Some plants take months to mature |
| Children learn biology and responsibility | Tools and irrigation systems require storage |
| Seasonal eating becomes natural | Unexpected costs from replanting failed crops |
| Stronger connection to local ecosystems | Time conflicts during peak growing weeks |
Advantages of Self-Sufficiency and Health
Harvesting your own vegetables means consuming produce at peak ripeness, maximizing nutrient content and taste. You avoid wax coatings and long-haul transportation typical of supermarket greens. Growing kale, tomatoes, or carrots gives you control over what touches your food, supporting dietary preferences and reducing exposure to unwanted chemicals. A mid-sized SaaS firm employee in Oregon reported eating twice as many servings of vegetables after starting a 4×8-foot raised bed.
Navigating Time Commitments and Upfront Costs
Starting a garden requires an initial investment in soil, seeds, and basic tools, often totaling several hundred dollars for a modest setup. Weekly tasks like watering, weeding, and monitoring for disease demand consistent effort, especially during summer months. A drip irrigation system can reduce daily watering time but adds to startup expenses. Some beginners underestimate how quickly small costs accumulate, from compost to trellises.
One gardener in central Ohio spent $320 on lumber, soil amendments, and seedlings for a 10×10-foot plot, then dedicated four hours weekly during June and July to maintain it. That effort yielded over 80 pounds of vegetables by September, effectively reducing her grocery bill. Unexpected expenses, like replacing a failed batch of lettuce due to early heat, added $40 mid-season. Planning for both time and cost fluctuations improves sustainability.
Launching the Project: A Step-by-Step Implementation
Begin by mapping out your garden’s layout according to sunlight exposure and plant needs. The following table outlines key actions and their purpose during initial setup:
| Action | Purpose |
| Mark garden boundaries | Define growing area and prevent encroachment |
| Remove grass and weeds | Eliminate competition for nutrients and water |
| Test and amend soil | Balance pH and improve fertility |
| Install raised beds or rows | Enhance drainage and soil structure |
Clearing the Site and Soil Preparation
Start by removing any grass, weeds, or debris from the designated area using a spade or sod cutter. Loosen the top 8-12 inches of soil to encourage root development and improve drainage. If your soil is heavy clay or overly sandy, mix in several inches of compost or well-rotted manure to enhance texture and nutrient content. A simple soil test can reveal pH and nutrient levels, guiding any necessary amendments.
Strategic Planting and Initial Irrigation
Position taller plants like tomatoes or corn on the north side to avoid shading smaller crops. Follow seed packet instructions for spacing and depth, grouping plants with similar water and sun needs. After planting, water gently but thoroughly using a soaker hose or watering can to avoid disturbing seeds or seedlings. Consistent moisture in the first week establishes strong root growth.
Consider interplanting fast-growing crops like radishes between slower ones such as carrots to maximize space. This technique, used by a mid-sized urban garden in Portland, improves yield without overcrowding. Water early in the morning to reduce evaporation and prevent fungal diseases. Once seedlings emerge, adjust irrigation based on weather and soil moisture, not a fixed schedule.
Cultivation Mastery: Essential Maintenance Tips
Consistent care keeps your garden productive and resilient. Water deeply two to three times per week, depending on weather, ensuring moisture reaches root zones. Rotate crops annually to prevent nutrient depletion and disrupt pest cycles. Prune overgrown branches and remove spent blooms to encourage new growth. Monitor plant health weekly, noting discoloration or stunted development as early warning signs.
- Check irrigation systems for clogs or leaks every two weeks
- Label each plant at time of planting for easy tracking
- Keep a simple log of growth milestones and interventions
Any oversight, such as letting tomato vines sprawl unchecked, can reduce airflow and invite fungal issues.
Organic Pest Management Strategies
Healthy soil supports strong plants that naturally resist pests. Introduce beneficial insects like ladybugs and lacewings to control aphid populations. Handpick larger pests such as Japanese beetles in the early morning. Neem oil or insecticidal soap can manage infestations without synthetic chemicals.
Barriers like row covers protect seedlings while allowing light and water penetration.
Mulching and Fertilization Techniques
Apply a two- to three-inch layer of organic mulch like straw or shredded leaves around plants to conserve moisture and suppress weeds. Leave a small gap around stems to prevent rot. Use compost or well-rotted manure as a slow-release fertilizer, incorporating it into the top few inches of soil before planting.
Any nutrient boost should align with plant needs-leafy greens respond well to nitrogen-rich amendments, while fruiting plants benefit from added phosphorus.
Timing matters when fertilizing; side-dress heavy feeders like corn and squash every four to six weeks during active growth. Mulch breaks down over time, enriching the soil, so replenish it mid-season if it thins. A mid-sized SaaS firm might track software updates similarly, but in the garden, observation replaces dashboards-watch for lush growth or yellowing leaves as real-time feedback.
Maximizing Yield: Harvesting and Storage
Identifying Peak Ripeness for Various Crops
Tomatoes should detach easily from the vine when fully colored and slightly soft to the touch. Cucumbers lose their crispness if left too long, so harvest them while still firm and before they turn yellow. For leafy greens like lettuce and spinach, pick individual outer leaves once they reach usable size, allowing the center to keep producing. Zucchini tastes best under 8 inches long, while beans should be snapped when slender and before seeds bulge. Root crops such as carrots and radishes often signal readiness by pushing slightly above the soil line.
Proper Post-Harvest Handling
Cool, dry conditions preserve most vegetables immediately after picking. Rinse leafy greens gently and spin them dry to remove excess moisture that encourages spoilage. Store tomatoes at room temperature away from direct sunlight to maintain flavor and texture. Root vegetables like beets and potatoes last longer when stored in a dark, cool place with good airflow, not in the refrigerator. Herbs such as basil and cilantro benefit from being treated like cut flowers-place stems in a glass of water on the counter or wrap them in a damp cloth and refrigerate.
Excess moisture accelerates mold in berries and delicate fruits, so avoid washing them until just before use. A shallow tray lined with paper towels in the fridge can extend the life of strawberries by absorbing ambient dampness. Peppers and eggplants deteriorate faster when chilled too soon, so keep them in a cool part of the kitchen for up to five days. Proper sorting-removing bruised or damaged produce-prevents spoilage from spreading among stored items.
Summing up
Starting a backyard garden from scratch requires observation, preparation, and consistent care. You’ve assessed sunlight patterns, chosen a suitable layout, and selected crops aligned with your climate and soil. Each step, from amending the bed to watering seedlings, builds foundational skills that improve with practice. A mid-sized SaaS firm might track metrics rigorously, but in gardening, progress shows in greener leaves, stronger stems, and eventually, homegrown tomatoes ripening on the vine.
Your first harvest, even if modest, reflects direct results of your effort. Over time, crop rotation, composting, and seasonal planning refine your approach. Success isn’t measured solely in yield but in resilience-how well you adapt when pests appear or rain falls unevenly. Gardeners at any level find satisfaction in watching seeds they planted thrive through careful tending and timely intervention.